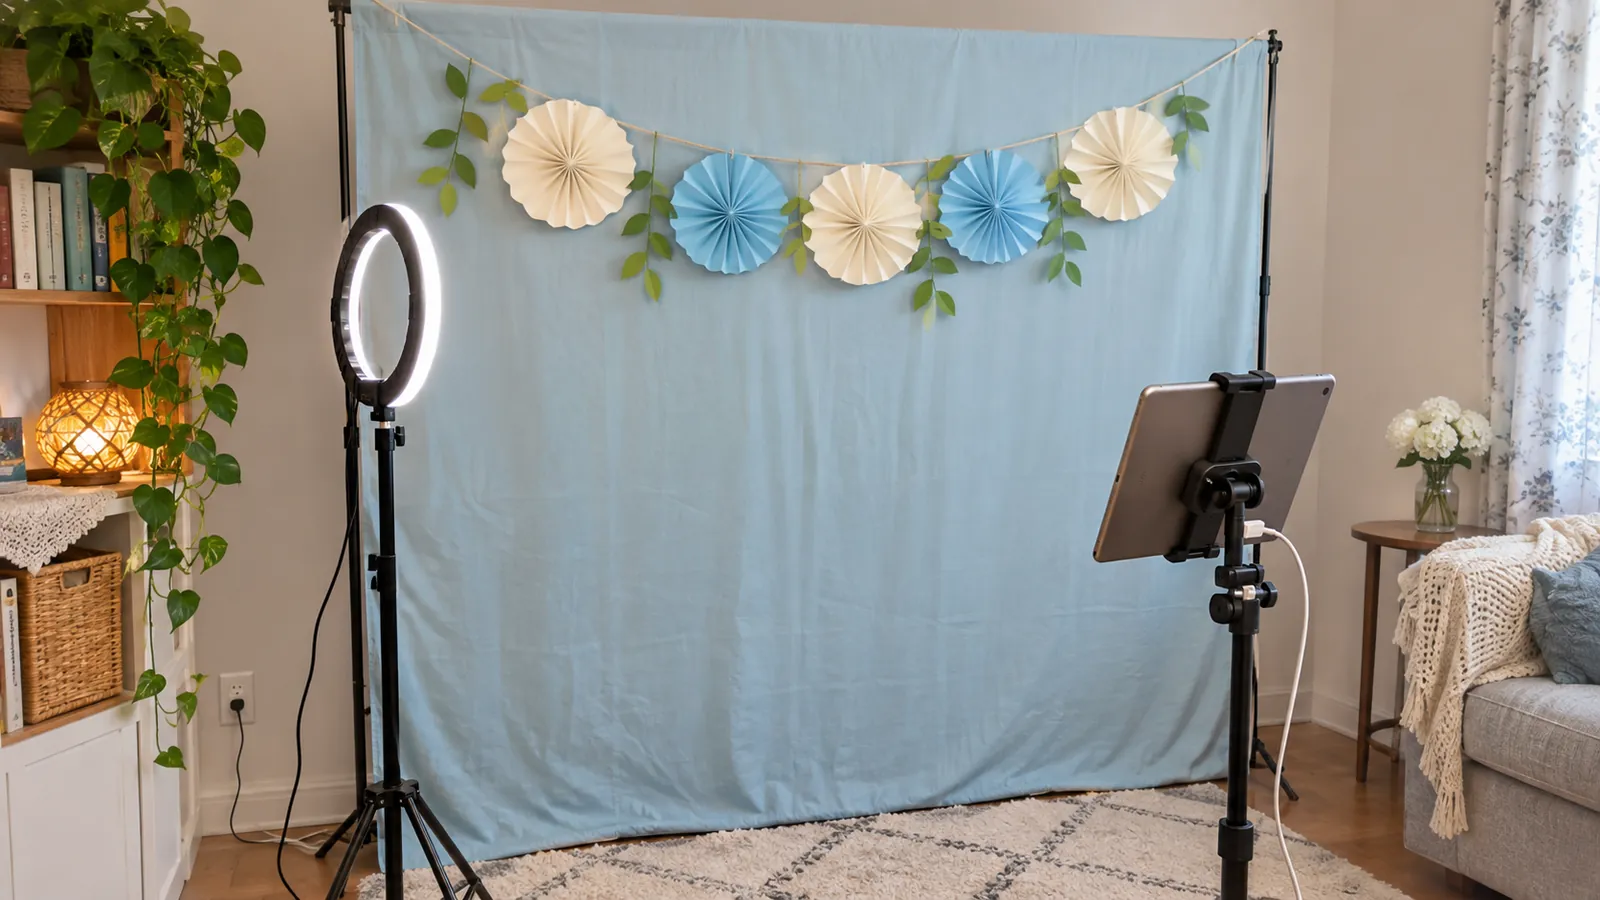
To make a DIY photo booth, you need five things: a backdrop, a light in front of the guests, an iPad or iPhone on a stand, a small basket of props, and a way for guests to get their photos. Have guests stand two to three feet (0.6 to 0.9 m) in front of the backdrop, put the iPad at chest height four to six feet (1.2 to 1.8 m) from them, light the guests from behind the camera, and run a photo booth app so every session has a countdown, a finished layout and a QR code or print. You can set it all up in an afternoon.
This guide covers the shopping list, the setup step by step, and ideas for a DIY wedding photo booth and a graduation party photo booth. For the iPad side in detail (stand, power, Guided Access, final checks), see the iPad photo booth setup guide.
DIY photo booth checklist
| Item | What to use | Budget option |
|---|---|---|
| Camera | An iPad or iPhone running iPadOS or iOS 15 or later | The device you already own |
| Stand | A tripod with a tablet mount, or a floor stand for iPads | A stack of books on a high table |
| Backdrop | A backdrop stand with fabric, a curtain, a balloon wall or a sequin panel | A plain wall, a bedsheet or a curtain you already have |
| Light | An LED panel, softbox or ring light on a stand | A table lamp with a white shade behind the iPad |
| Power | Charger plus a long cable or extension cord | Whatever reaches the outlet, taped down |
| Props | Five to ten items: signs, hats, glasses | Signs printed on card stock |
| App | A photo booth app with countdown, layouts and sharing | Photo Booth App, first event free |
| Sharing | QR code, AirDrop, email or text | QR code on the booth screen |
| Printer (optional) | An AirPrint photo printer | Skip it and share digitally |
| Floor mark | Tape where guests should stand | Two strips of painter's tape |
If you are still deciding whether to rent or build your own, the photo booth cost guide compares rental prices with a DIY iPad booth.
How to set up a DIY photo booth, step by step
1. Pick the spot
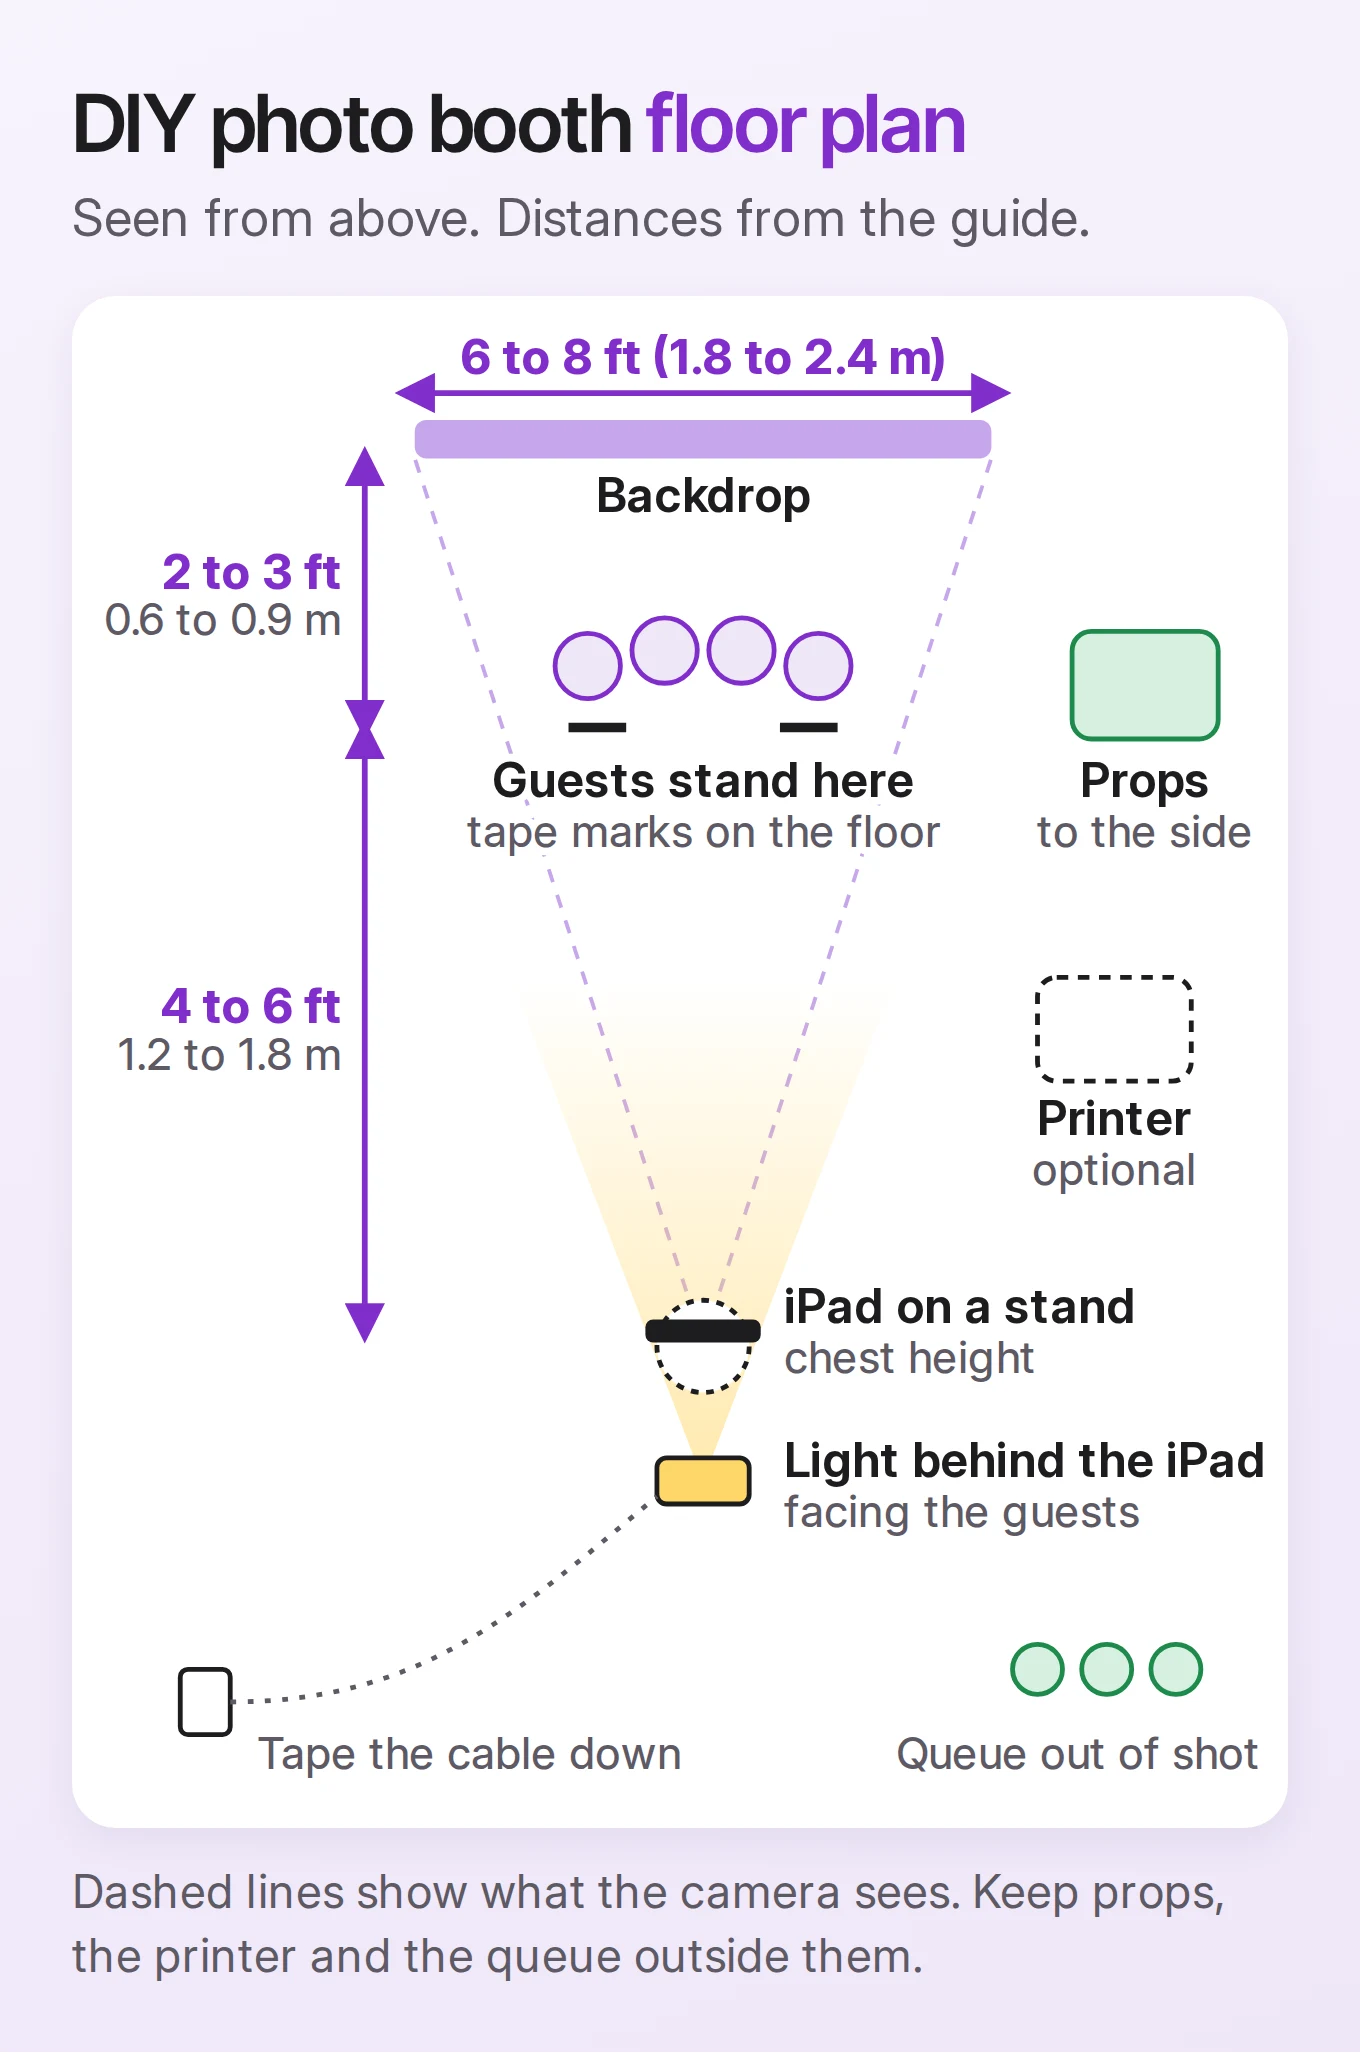
Choose a place guests walk past (near the bar, the dance floor or the guest book), with an outlet nearby and room for a small group to stand. You need roughly the width of the backdrop plus a few feet (about a meter) in front of it for the camera and the queue. Avoid a spot where guests would stand in front of a bright window: the camera exposes for the window and faces go dark.
2. Put up the backdrop
The backdrop only has to fill the frame behind your biggest group. For four to six people that usually means something around 6 to 8 feet (1.8 to 2.4 m) wide and tall enough to clear the tallest guest. Leave two to three feet (0.6 to 0.9 m) between guests and the backdrop so their shadows do not land on it.
Backdrop ideas that work for a DIY booth:
- Fabric on a backdrop stand. A plain muslin, velvet or crushed fabric in one color. Wrinkles show less on darker or textured fabric.
- Balloon wall or garland. Great for birthdays and graduations, in the event colors.
- Sequin or shimmer panels. They add sparkle and catch the light when guests are lit from the front.
- Curtain and string lights. Warm lights on a dark curtain, for evening parties.
- A plain wall. Free, and often better than a cluttered background. Add the event's name on the template instead.
3. Light the guests from the front
Light is the difference between a DIY booth that looks cheap and one that looks rented. Put one light behind the iPad, slightly above face height, pointing at the guests. A soft LED panel or softbox is easier on the eyes than a bare bulb; a ring light works for small groups but can leave a ring reflection in glasses. If the room is dim, add a second light to the side so the backdrop does not fall into shadow.
4. Mount the iPad
Set the iPad at about chest height of an average adult, pointing straight at the group, and keep it plugged in. Start four to six feet (1.2 to 1.8 m) from where the guests will stand and adjust after a test photo with three people: everyone should fit with a little space around their heads. Landscape fits wider groups; portrait suits photo strips and tall designs.
5. Set up the booth app
In Photo Booth App:
- Create an event and pick a template, or import your own PNG or JPG artwork. See photo booth templates for how layouts work.
- Choose the guest screens: a welcome screen, one of the six countdown animations, and whether guests can take photos or GIFs.
- Turn on the sharing you want: QR code, AirDrop, email, text message, or AirPrint printing.
- Lock the iPad with Guided Access in iPadOS Settings, so guests stay inside the booth.
Your first event in the app is free. Photos are taken and saved without internet; QR downloads, email and online galleries need a connection, so test them on the Wi-Fi you will use.
6. Add props and a sign
Five to ten props is enough. Put them in a basket beside the booth, not in front of the camera. Add a small sign such as "Tap to start, then strike a pose" so guests know what to do without asking.
7. Decide on prints
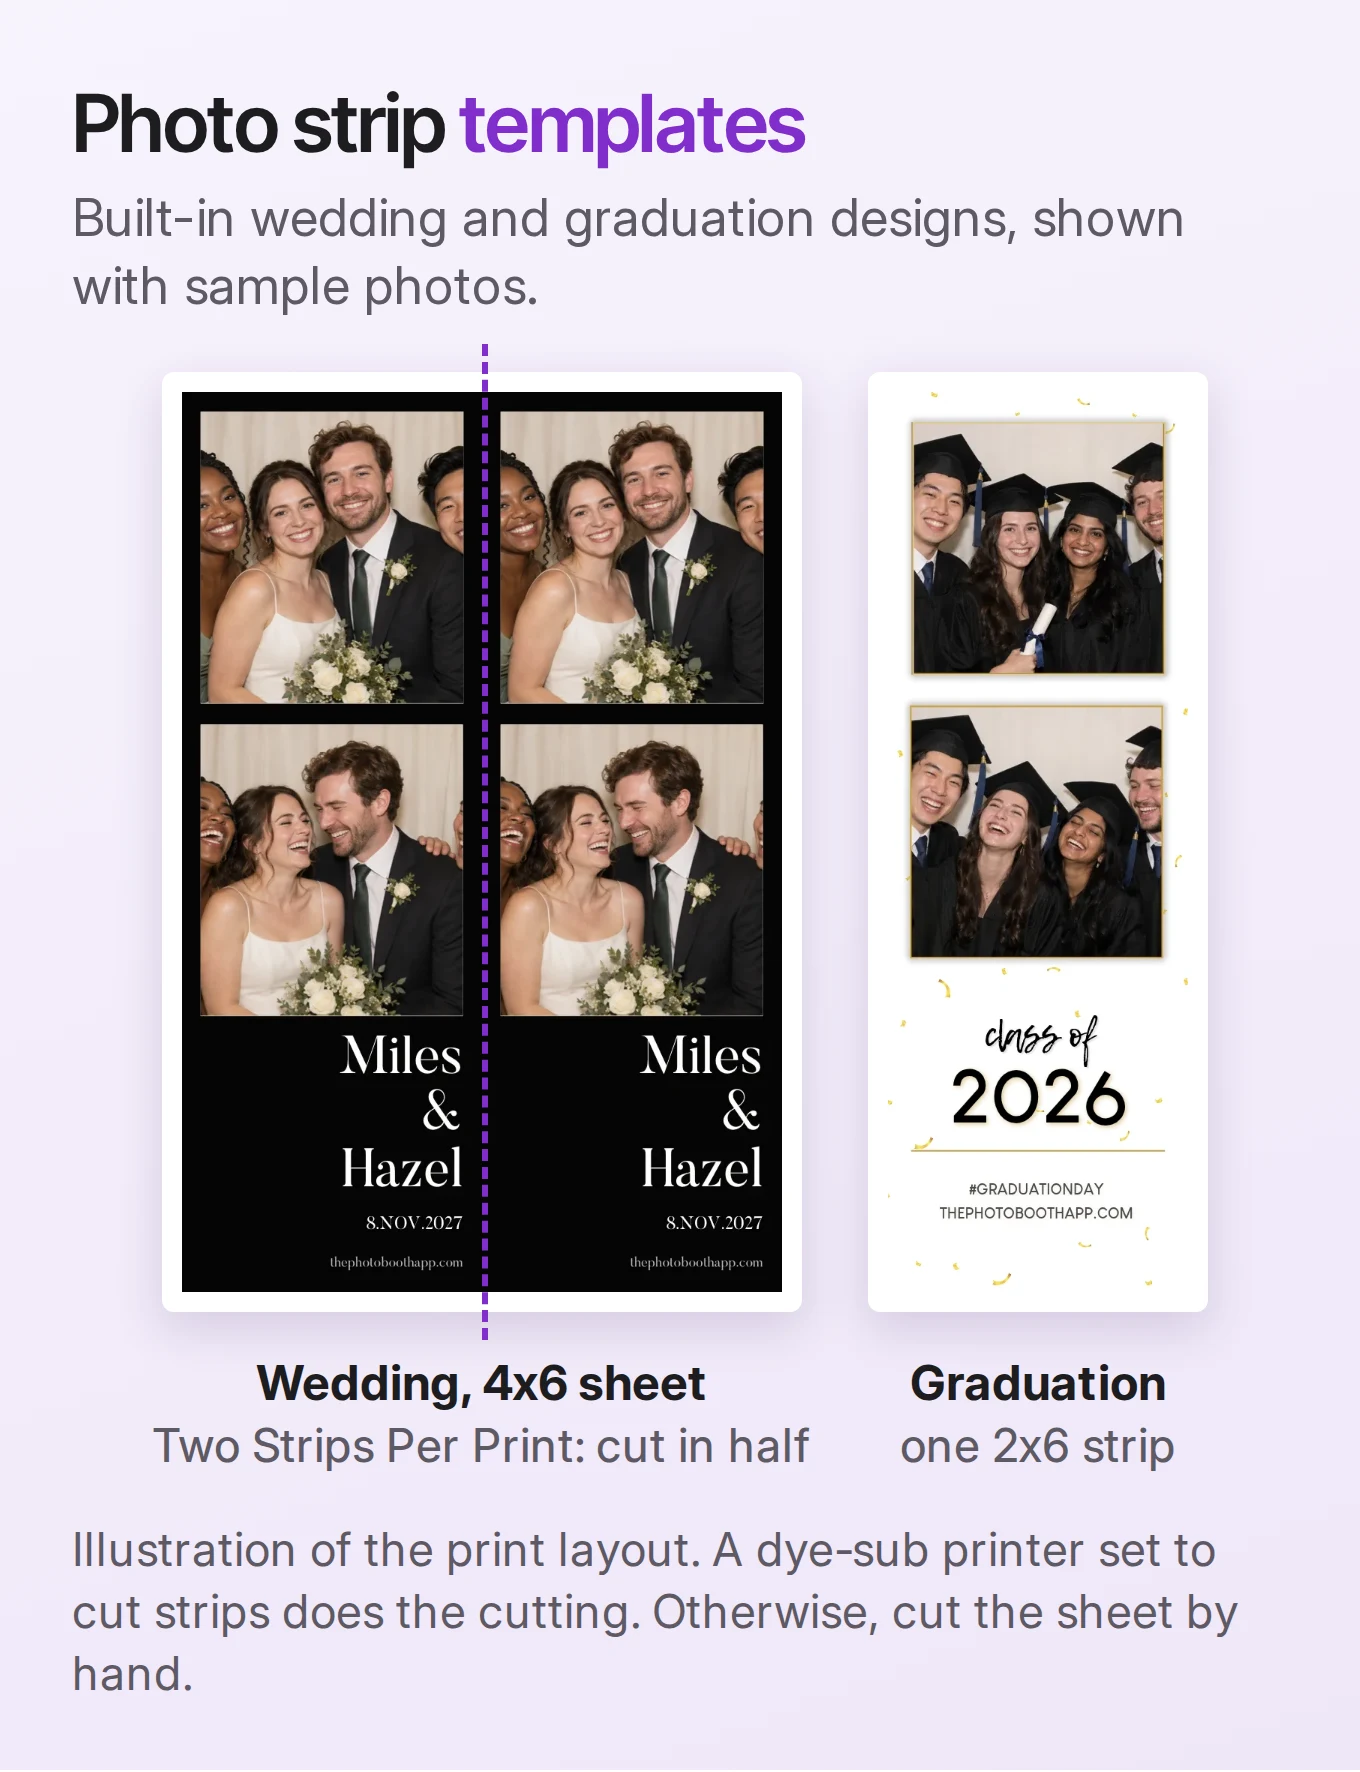
Prints are a lovely keepsake but slower than digital sharing, and they need paper, supplies and someone checking the tray. If you print, use a 4 × 6 or 2 × 6 strip layout that matches your paper. In Photo Booth App, Two Strips Per Print puts two identical strips on one 4 × 6 sheet.
The photo booth printer guide compares AirPrint and dye-sub printers for an iPad booth.
8. Run a full test
Before guests arrive, run three complete sessions with two or three people: take the photo, check the faces and template text, scan the QR code with another phone, and print if you plan to. Then ask someone who did not set it up to try it alone. If they get through without help, your guests will too.
DIY wedding photo booth
A DIY wedding photo booth works best when it looks like part of the reception, not a gadget in a corner.
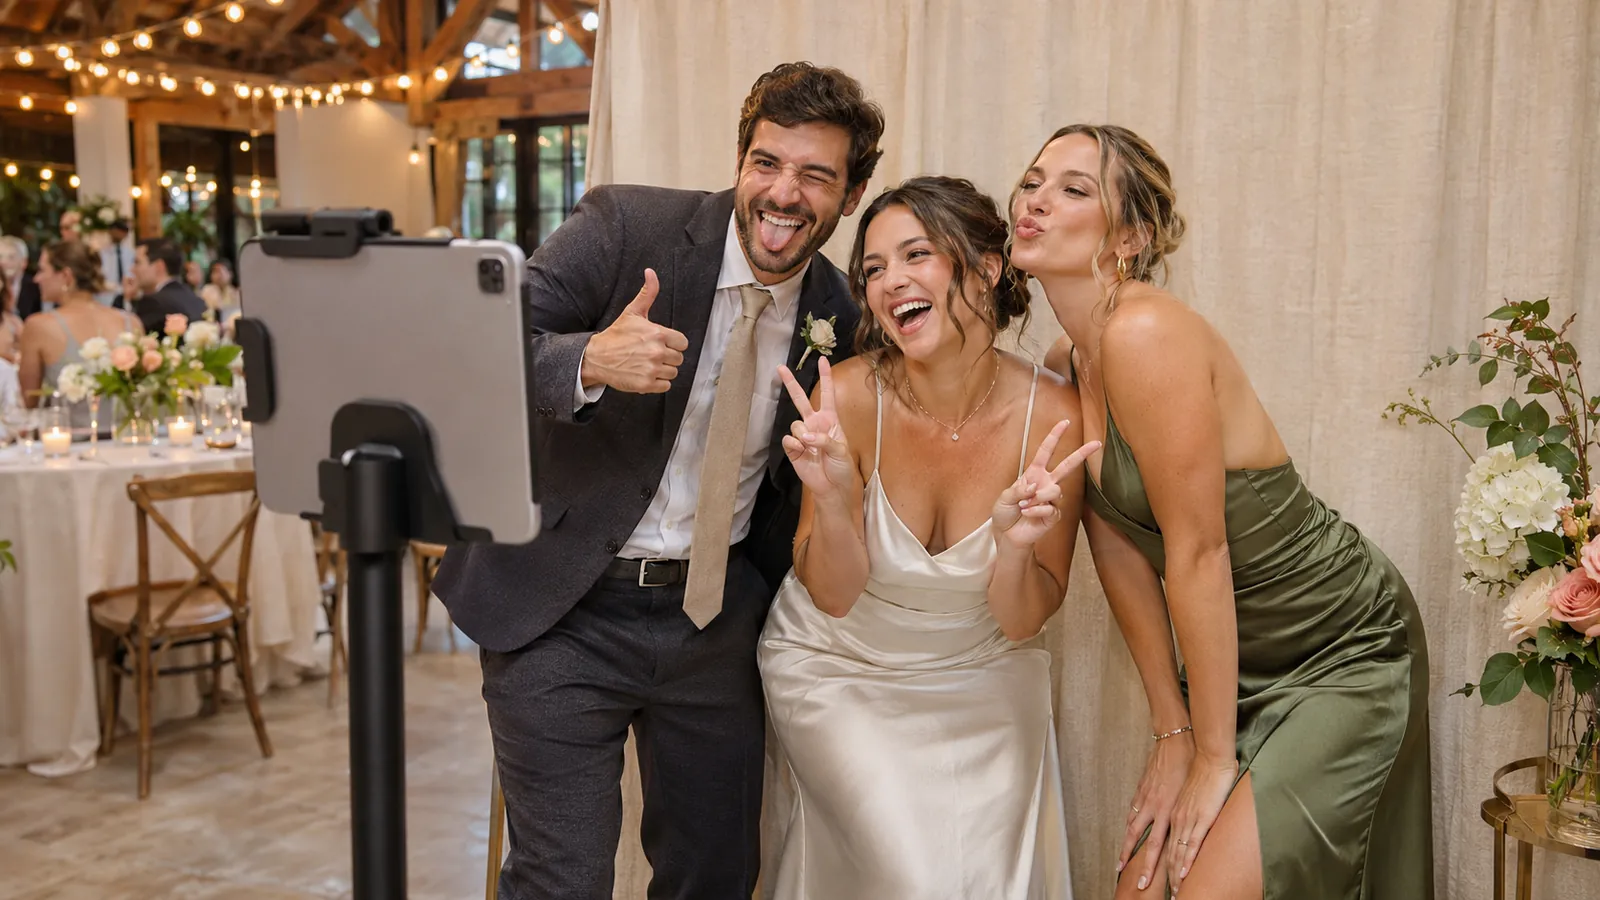
- Match the decor. Use the wedding florals, a greenery wall, draped fabric in the wedding colors, or the ceremony arch moved to the reception.
- Put the couple's names and date on the template. Keep text away from the edges in case prints are trimmed. You can pick a built-in wedding design or import artwork from your stationery designer.
- Give one person the job. A friend checks power, props and the printer every hour, so the couple never has to.
- Add a guest book. If you print, guests stick one copy in the book with a message. Plan two prints per session if they also take one home.
- Kick it off early. Ask the wedding party to take the first photos at the start of the reception so other guests follow.
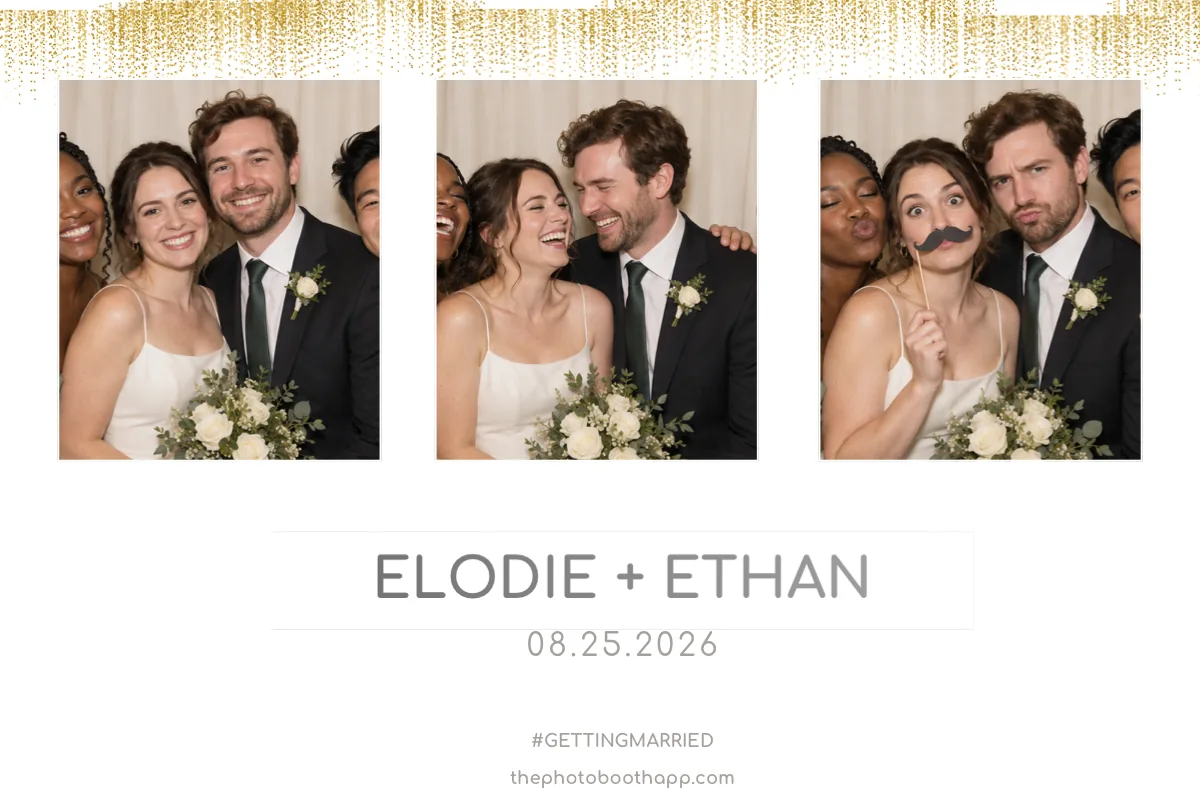
The wedding photo booth ideas post has more on placement and templates, and Margo and Manuel's wedding shows a real iPad booth.
DIY photo booth for a graduation party
Graduation parties are often outdoors, in a backyard or a park, and full of family who want one photo with the graduate.
- Backdrop in school colors. A balloon garland in the school colors, a "Class of 2027" banner or a wall of the graduate's photos from kindergarten on.
- Props that fit the day. A spare cap and tassel, a diploma tube, the college pennant, and signs like "Congrats grad" or "Next stop" with the graduate's next school or job.
- A graduation template. Photo Booth App includes graduation designs with "Class of" and "Congratulations" layouts. Change the text to the graduate's name and year. Browse the graduation templates.
- Outdoor light. Put the booth in open shade with the sun behind the camera, not behind the guests. Midday sun overhead gives harsh shadows under caps; a tent or a tree helps.
- Power and Wi-Fi in the yard. Run an extension cord and test the QR code from the booth's spot. If the Wi-Fi does not reach, keep taking photos (they save on the iPad) and share an online gallery link after the party.

Common DIY photo booth mistakes
- No front light. Most disappointing booth photos are too dark. Add light even if the room seems bright.
- Camera too low or too high. Chest height, pointing straight ahead, flatters most groups.
- Backdrop too small. Check the edges of a test photo with your largest group.
- Printer as the only option. Keep QR sharing on so the queue moves when the paper runs out.
- Nobody in charge. Someone should look at the booth once an hour.
Start simple: one backdrop, one light, an iPad on a stand and a basket of props. Download Photo Booth App, set up your first event for free, and take a test photo the day before.
If you build a DIY booth with Photo Booth App, I would love to hear how it went: the backdrop you chose, the props guests loved, and anything that could be better in the app.
Thank you for reading, and have a wonderful party. 📸
Manuel Escrig
FAQ
How do you make a DIY photo booth?
Pick a spot with room for a small group, hang a plain or decorated backdrop, put a light behind the camera facing the guests, and mount an iPad or iPhone on a stand at about chest height. Run a photo booth app with a countdown and sharing, add a basket of props, and take a test photo with three people before guests arrive.
What do I need for a DIY photo booth?
A backdrop (a curtain, sheet, balloon wall or a plain wall), one front light, an iPad or iPhone, a tripod or tablet stand, a charger with a long cable, a few props, and a photo booth app. A printer is optional: QR codes and AirDrop let guests take photos home without one.
Can I use an iPad as a DIY photo booth?
Yes. An iPad running iPadOS 15 or later can run Photo Booth App: guests tap to start, follow a countdown, and get a finished photo or GIF by QR code, AirDrop, email, message or an AirPrint print. Turn on Guided Access so guests stay inside the app.
How big should a DIY photo booth backdrop be?
Wide enough that the backdrop fills the frame behind your largest group. For four to six people that usually means a backdrop around 6 to 8 feet (1.8 to 2.4 m) wide. Check it with a test photo: if you see the wall or the edge of the stand, move the camera closer or the group nearer the backdrop.
How do you make a DIY photo booth for a graduation party?
Use the school colors for the backdrop or balloons, add a Class of year sign and a spare cap and tassel as props, and pick a graduation template with the graduate's name and year. Outdoor parties need shade behind the guests and the sun in front of them, or the faces turn dark.
Is a DIY photo booth cheaper than renting one?
Usually, yes. If you already own an iPad or iPhone, the rest is a stand, a light, a backdrop and props, and many hosts already have some of them. A rental includes an attendant, equipment and unlimited prints, so it can still make sense for a large wedding. Our photo booth cost guide compares the two.

Manuel Escrig
Manuel is the creator of Photo Booth App and GoInspired LLC. He builds the iPhone, iPad, web, and event-gallery pieces behind the product. Read more about me
 Share on Facebook
 Share on X
Keep reading
All posts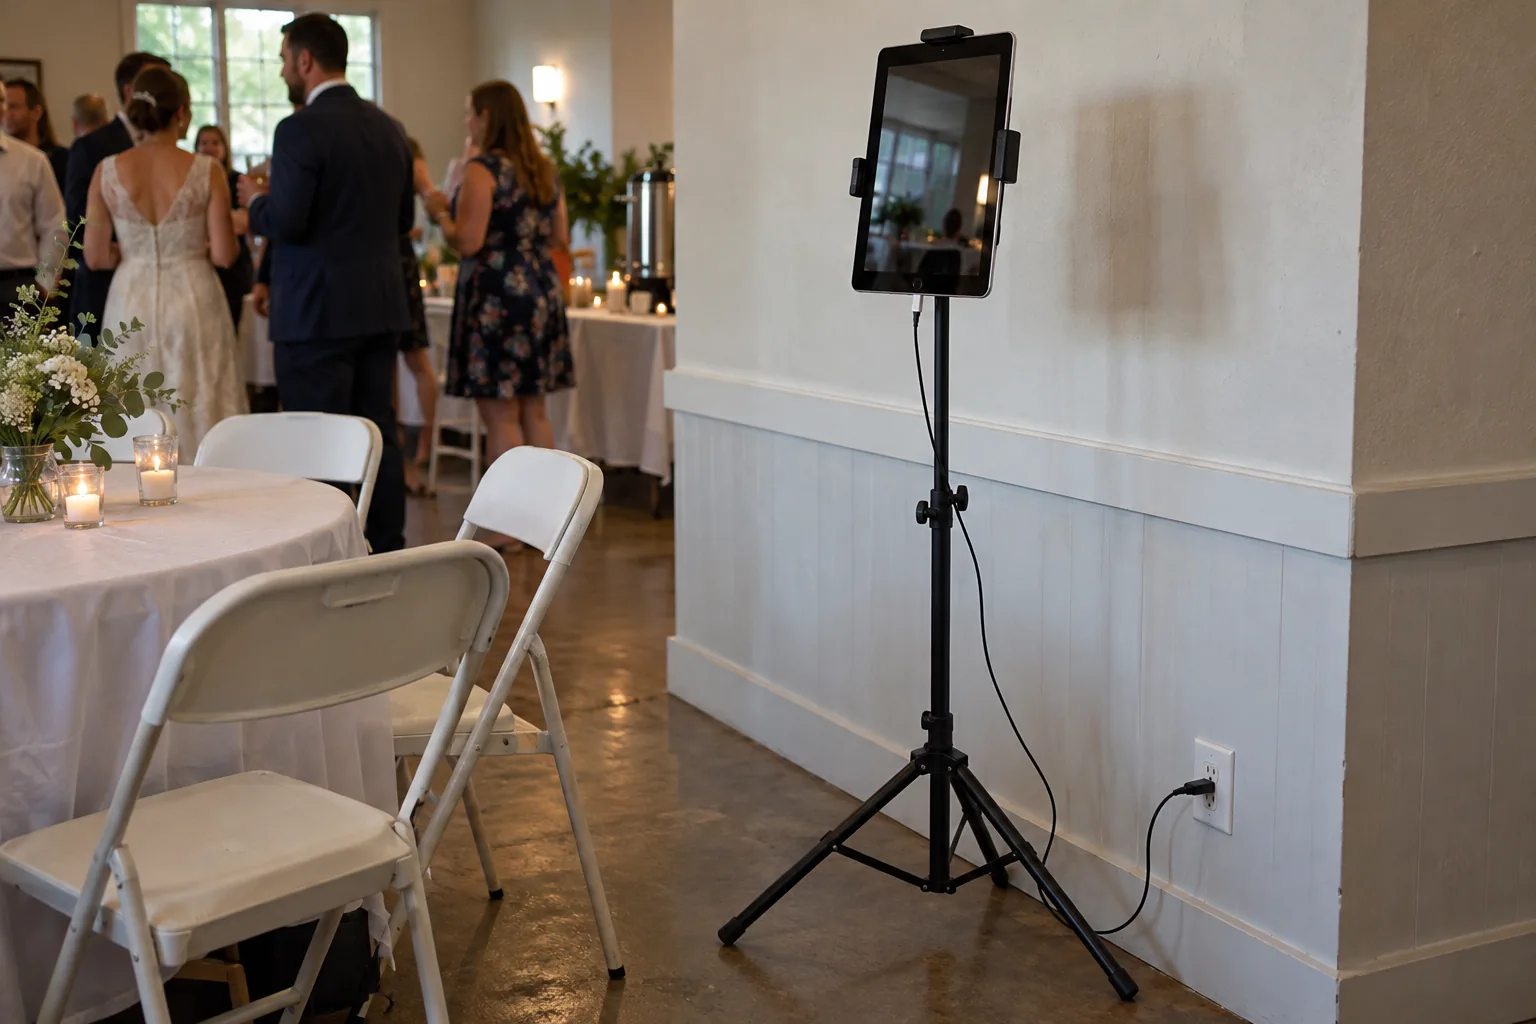
Photo Booth Cost: Rental Prices vs a DIY iPad Booth
How much does a photo booth cost? Rentals typically run $450 to $1,000 per event, more for weddings. See prices per hour and what a DIY iPad booth costs.
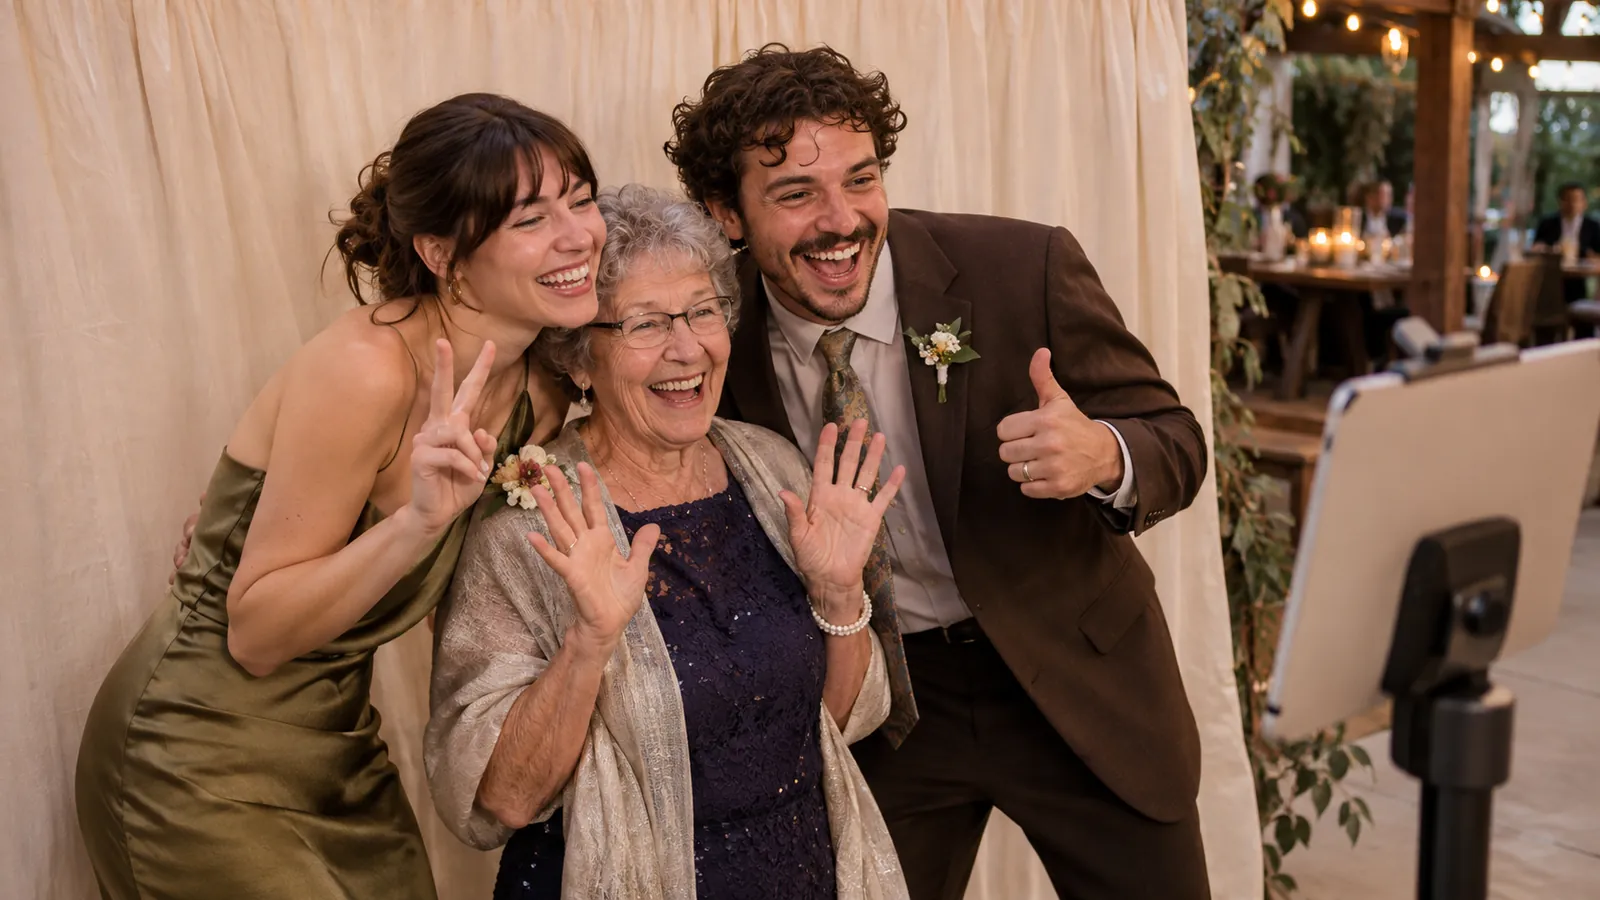
Photo Booth Printer: Best AirPrint and DNP Picks for iPad
Which photo booth printer works with an iPad? DNP dye-sub and AirPrint photo printers compared on speed, cost per print, 2x6 strips and setup.